The following procedure will guide you through recording audio with a microphone on the BR-1600CD:
1. Bring the MASTER volume fader all the way down.
2a. If you are using a microphone that does not require Phantom Power (e.g. dynamic mic), proceed to step 3.
2b. If you are using a microphone that requires Phantom Power (e.g. condenser mic):
a. Press the UTILITY button.
b. CURSOR to "SYSTEM" and then press ENTER.
c. CURSOR to "Phantom" and then use the TIME/VALUE dial to select "ON".
Phantom power is now being supplied to XLR inputs 1-8.
Note: Check the documentation of your microphone to determine if phantom power is required.
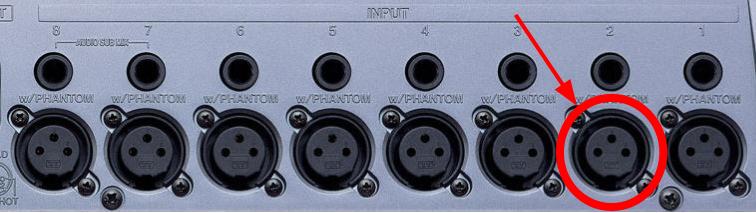
3. Connect your microphone into the XLR input of VOCAL/INPUT2/MIC2 on the back panel of the BR-1600CD.
4. Press the VOCAL button on the top left of the unit so that it is illuminated red.
5. On the top of the unit, adjust the second white INPUT SENS knob labeled VOCAL/INPUT2/MIC2. Adjust this knob until the red PEAK light next to the knob
flashes occasionally when you are singing or talking into the microphone.

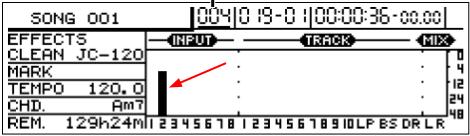
6. Adjust the black INPUT LEVEL knob on the left panel until the INPUT 2 meter on the LCD screen stays between –12 and –4.
7. Slowly bring up the MASTER volume fader level. Your microphone volume will be output to speakers connected to the LINE OUT of the BR-1600CD.
Note: If you are using headphones, you can now adjust the headphone volume on the bottom, front panel where the headphones connect to the
BR-1600CD.
8. Press the TRACK BUTTON of the track that you would like to record audio to. The selected track button will begin to blink.

9. Press the REC button and then press PLAY. The BR-1600CD will begin to record sound from your microphone onto the track that you previously chose.